VNF and Virtual Router
Appliance Description
The Virtual Router (VR) is a solution to common problems regarding management of VNETs and routing. It consists of the Service Virtual Router, which is deployed as a set of Virtual Machines, and associated logic implemented in the core of HyperCX.
Main Features
The VR includes a comprehensive set of features:
- Keepalive Failover, High-Availability for the Service Virtual Router itself
- Router4, for fine control of routing between your Virtual Networks
- NAT4 to enable private Virtual Networks to reach the Internet
- HAProxy Load Balancer, a robust layer4 (TCP) reverse-proxy/load-balancing solution
- Keepalive LVS Load Balancer, so called layer4 switching, a high-performance load-balancing solution
- SDNAT4, a public-to-private, private-to-public IP address mapping (SNAT + DNAT)
- DNS, a DNS recursor (to provide DNS to isolated Virtual Networks)
- DHCP4, an additional DHCP server implementation
- WireGuard, a simple and lightweight VPN server to securely connect to HyperCX virtual networks.
Quick Start
A newly-created Virtual Router (VR) is simply a resource in HyperCX, and as such does not perform any networking tasks by itself. To work with VR, you must first instantiate Service Virtual Router Virtual Machines.
Let’s assume you have two HyperCX Virtual networks (public and private), and you want to deploy a Virtual Router with failover capabilities so the VMs in the private network can reach the Internet. The topology will be as follows:
Public Network
───────────────────┬─────────────
                   │ FLOATING_IP (3.27.6.5)
 ┌─ ─ ─ ─ ─ ─ ─ ─ ─┼ ─ ─ ┐
 │ Virtual Router  │     │
 │ ┌────┴───┐ ┌────┴───┐ │
 │ │        │ │        │ │
 │ │  VR-1  │ │  VR-2  │ │
 │ │        │ │        │ │
 │ └──eth1──┘ └──eth1──┘ │
 │     │           │     │
 │  10.0.0.2    10.0.0.3 │
 │                 │     │
 └─ ─ ─ ─ ─ ─ ─ ─ ─│─ ─ ─┘
                   │ FLOATING_IP (10.0.0.1)
───────────────────┼──────────┬──────────┬───────
Private Network    │          │          │
(10.0.0.0/24)      │          │          │
                 ┌─┴──┐     ┌─┴──┐     ┌─┴──┐
                 │ VM │     │ VM │     │ VM │
                 └────┘     └────┘     └────┘
Here’s a procedure to get you started:
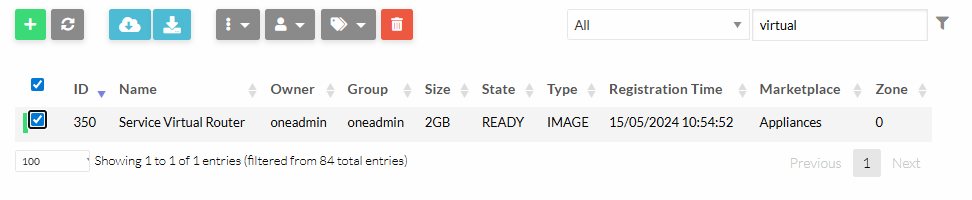
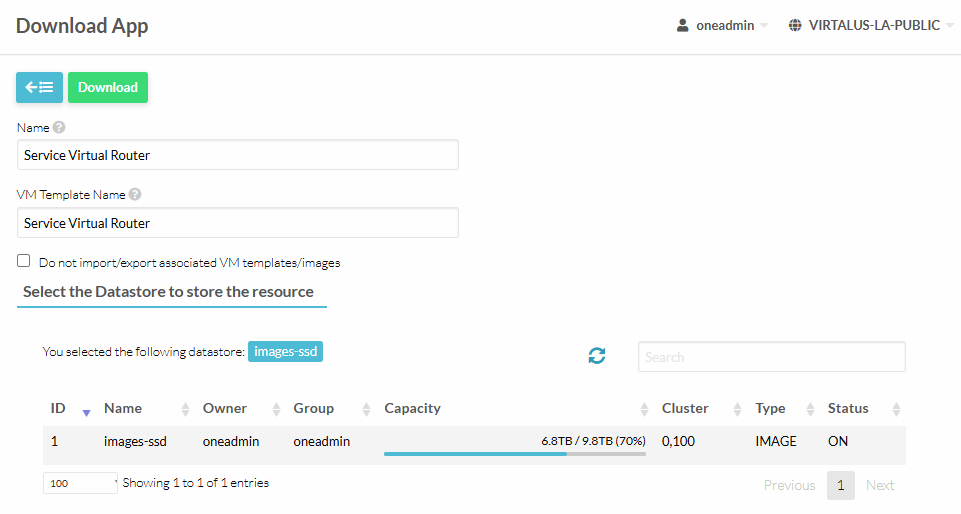
- Download the latest VR image from the APpliances Marketplace.
Update the private Virtual Network so the DEFAULT_GW points to the VROUTER_IP in the private network. In the case of HA VR, set the Floating IP as the DEFAULT_GW of the private network.
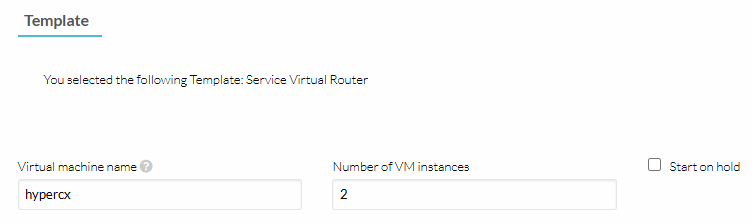
- Instantiate the VR using the new downloaded template.
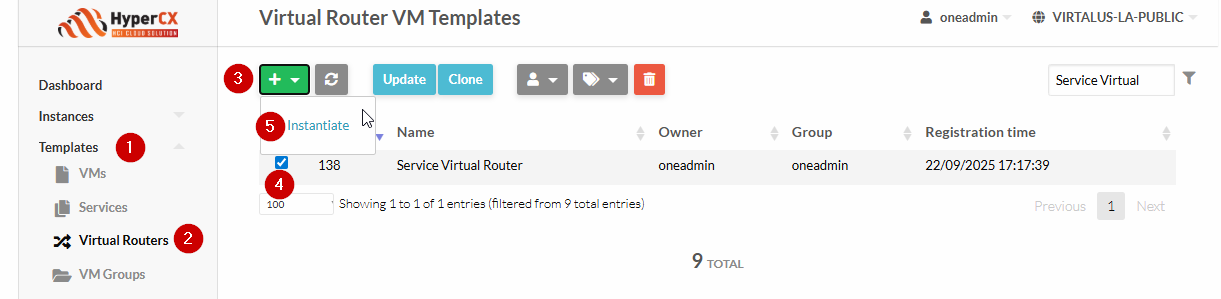
It is recommended to use at least 2 instances of the VR, for the sake of failover.
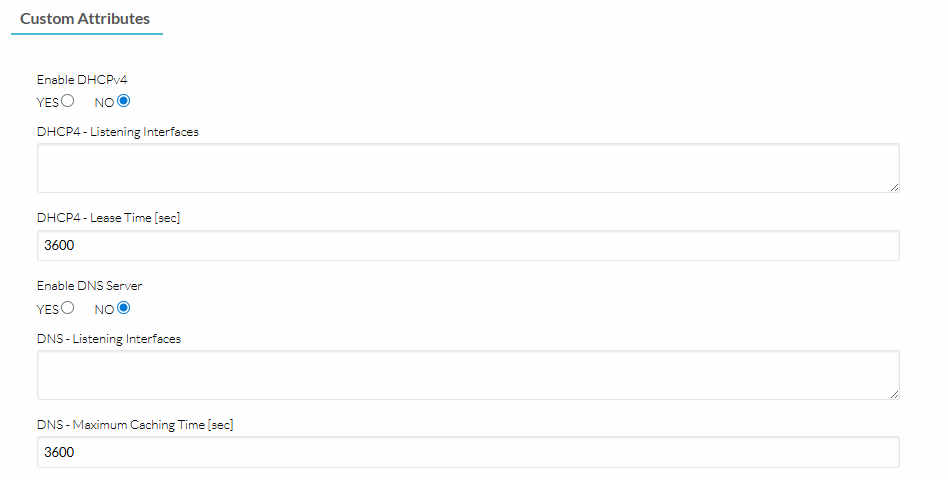
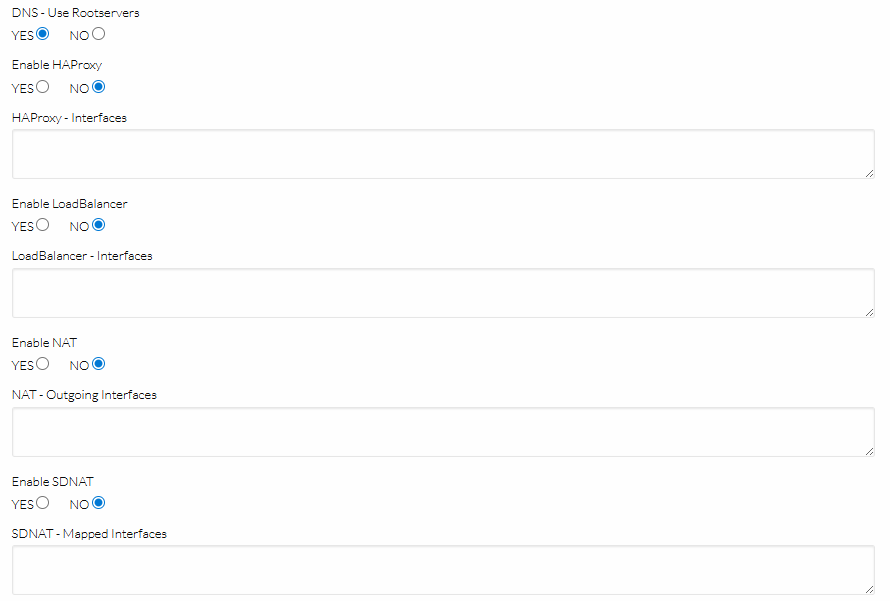
These are the available Custom Attributes that comes configured by default with the appliance:
VR OpenRC Services
Each feature of the VR is represented by an OpenRC service. There are two types of such services, some are one-shot like NAT4, and others are daemons like SDNAT4 or HAProxy.
To list all running services, run rc-status.
Example output:
Runlevel: default
 keepalived                                       [  started  ]
 one-failover                                     [  started  ]
 haveged                                          [  started  ]
 crond                                            [  started  ]
 qemu-guest-agent                                 [  started  ]
 sshd                                             [  started  ]
 acpid                                            [  started  ]
Dynamic Runlevel: hotplugged
Dynamic Runlevel: needed/wanted
 sysfs                                            [  started  ]
 udev                                             [  started  ]
 fsck                                             [  started  ]
 root                                             [  started  ]
 localmount                                       [  started  ]
 udev-trigger                                     [  started  ]
 udev-settle                                      [  started  ]
Dynamic Runlevel: manual
 iptables                                         [  started  ]
 one-lvs                                          [  started  ]
 one-sdnat4                                       [  started  ]
 one-dhcp4v2                                      [  started  ]
 one-dns                                          [  started  ]
 one-haproxy                                      [  started  ]
 one-nat4                                         [  started  ]
 unbound                                          [  started  ]
 one-context-reconfigure                          [  started  ]
 one-router4                                      [  started  ]
 haproxy                                          [  started  ]
 one-context-reconfigure-delayed                  [  started  ]
To start/stop/restart a service:
rc-service <openrc-service> <start | stop | restart>
The list of OpenRC services implementing each of the virtual router features are describes in the table below:
| OpenRC Service | Type | Runlevel | Config Path (INPUT) | Config Path (OUTPUT) | Log Path |
|---|---|---|---|---|---|
keepalived | daemon | default | /etc/keepalived/ (dir) | /var/log/messages | |
one-failover | daemon | default | /run/one-context/one_env | /var/log/one-appliance/one-failover.log | |
one-lvs | daemon | manual | /run/one-context/one_env | /etc/keepalived/conf.d/lvs.conf | /var/log/one-appliance/one-lvs.log |
one-router4 | oneshot | manual | /run/one-context/one_env | /etc/sysctl.d/98-Router4.conf | /var/log/one-appliance/one-router4.log |
iptables | oneshot | manual | /etc/iptables/ (dir) | /etc/iptables/ (dir) | /var/log/messages |
one-nat4 | oneshot | manual | /run/one-context/one_env | (iptables -t nat) | /var/log/one-appliance/one-nat4.log |
one-sdnat4 | daemon | manual | /run/one-context/one_env | (iptables -t nat) | /var/log/one-appliance/one-sdnat4.log |
haproxy | daemon | manual | /etc/haproxy/ (dir) | /var/log/messages | |
one-haproxy | daemon | manual | /run/one-context/one_env | /etc/haproxy/ (dir) | /var/log/one-appliance/one-haproxy.log |
unbound | daemon | manual | /etc/unbound/ (dir) | /var/log/unbound/ (dir) | |
one-dns | daemon | manual | /run/one-context/one_env | /etc/unbound/ (dir) | /var/log/one-appliance/one-dns.log |
one-dhcp4v2 | daemon | manual | /run/one-context/one_env | /etc/one-appliance/service.d/VRRouter/DHCP4v2/coredhcp-onelease/onelease-config.yml | /var/log/one-appliance/one-dhcp4v2.log |
 Note
Note
Services prefixed with one- have been designed to automatically manage their counterparts (if present), so for example stopping one-haproxy automatically stops the haproxy service as well, etc.OpenRC Services Contextualization
Each feature of the VR goes through three lifecycle steps:
| Step | Frequency | Log Path | Description |
|---|---|---|---|
install | once | /var/log/one-appliance/install.log | Install required software and render OpenRC scripts. |
configure | recurring | /var/log/one-appliance/configure.log | Render static configuration files. |
bootstrap | recurring | /var/log/one-appliance/bootstrap.log | No operation for VR. |
Note
The install stage is executed during image build, only once. Note
The configure and bootstrap stages are executed every time (re)contextualization takes place, i.e. on occasions like: initial deployment, reboot, context modification, NIC attach, etc. Note
During (re)contextualization the one-contextd daemon creates (among others) the /run/one-context/one_env file, which is then loaded for each of the OpenRC services as environment variables (configuration).VR Module: Router4
This feature selectively controls IP forwarding via sysctl. This is a basic feature to forward network packets across the virtual router network, and it is enabled by default, you can select which interfaces are used.
 Important
This module is enabled by default. You only need to add some configuration attributes to fine tune its operation.Router4 Configuration
The following attributes control the basic forwarding configuration:
- ONEAPP_VNF_ROUTER4_ENABLED enabled by default.
- ONEAPP_VNF_ROUTER4_INTERFACES list of interface names to forward packets
For example, when three NICs (eth0, eth1, eth2) are attached to a VR:
CONTEXT = [
  ...
  ONEAPP_VNF_ROUTER4_ENABLED    = "YES",
  ONEAPP_VNF_ROUTER4_INTERFACES = "eth0 eth1", # same as "!eth2"
  ...
]
Check following config file on the VR:
cat /etc/sysctl.d/98-Router4.conf
Gives the follow:
net.ipv4.ip_forward = 0
net.ipv4.conf.all.forwarding = 0
net.ipv4.conf.default.forwarding = 0
net.ipv4.conf.eth0.forwarding = 1
net.ipv4.conf.eth1.forwarding = 1
net.ipv4.conf.eth2.forwarding = 0
Router4 Context Configuration Attributes
| Parameter | Default | Description |
|---|---|---|
ONEAPP_VNF_ROUTER4_ENABLED | YES | Enable/Disable Router feature (YES/NO). |
ONEAPP_VNF_ROUTER4_INTERFACES | all NICs | List of routed NICs (e.g., eth0, eth1, …). |
VR Module: NAT4
Use this mode when the VMs behind the Virtual Router have private IP addresses, and your goal is to enable their internet access through the Virtual Router. This feature enables MASQUERADE in the POSTROUTING iptables chain.
The following figure depicts the basic LAN topology assumed by the module:
            Public Network
      ┌───────────────────────
   ┌──┴─┐ (*) NAT
┌──┤eth0├──┐
│  └────┘  │
│  Virtual │
│  Router  │
│  ┌────┐  │
└──┤eth1├──┘
   └─┬──┘
     │   Private Network (e.g. 192.168.0.0/24)
     └────┬───────────┬────────────┬──────────
       ┌──┴──┐     ┌──┴──┐      ┌──┴──┐
       │ VM1 │     │ VM2 │      │ VM3 │
       └─────┘     └─────┘      └─────┘
NAT4 Configuration
The following attributes control the basic configuration for NAT’ing:
- ONEAPP_VNF_NAT4_ENABLED to activate the module
- ONEAPP_VNF_NAT4_INTERFACES_OUT defines the public interface
For example, for the example above simply add:
CONTEXT = [
  ...
  ONEAPP_VNF_NAT4_ENABLED        = "YES",
  ONEAPP_VNF_NAT4_INTERFACES_OUT = "eth0",
  ...
]
Check following iptables nat rules on the VR:
iptables -t nat -vnL NAT4-MASQ
Gives the follow:
Chain NAT4-MASQ (1 references)
 pkts bytes target     prot opt in     out     source               destination
  782 47944 MASQUERADE  0    --  *      eth0    0.0.0.0/0            0.0.0.0/0
Static, DNAT-based port-forwarding
You can define static DNAT port-forwarding rules for the NAT4 module, for example:
CONTEXT = [
  ...
  ONEAPP_VNF_NAT4_PORT_FWD0 = "1.2.3.4:1234:10.11.12.13:4321",
  ONEAPP_VNF_NAT4_PORT_FWD1 = "5.6.7.8:1234:10.11.12.13",
  ONEAPP_VNF_NAT4_PORT_FWD2 = "1234:10.11.12.13:4321",
  ONEAPP_VNF_NAT4_PORT_FWD3 = "2345:10.11.12.13",
  ONEAPP_VNF_NAT4_PORT_FWD4 = "<ETH0_EP0>:1234:10.11.12.13:4321",
  ONEAPP_VNF_NAT4_PORT_FWD5 = "<ETH1_EP0>:4321:10.11.12.13",
  ...
]
The syntax is similar to ssh -L local forwarding, i.e. old_dest:old_port:new_dest:new_port, where old_dest and new_port are optional.
Note
You can use <ETHx_IPy>, <ETHx_EPy> and <ETHx_VIPy> to interpolate the value for old_dest. Important
The mappings are defined in the PREROUTING chain in iptables for both TCP and UDP protocols.NAT4 Context Configuration Attributes
| Parameter | Default | Description |
|---|---|---|
ONEAPP_VNF_NAT4_ENABLED | NO | Enable/Disable NAT feature (YES/NO). |
ONEAPP_VNF_NAT4_INTERFACES_OUT | no NICs | Mandatory: Outgoing NICs for NAT (e.g., eth0, eth1, …). |
ONEAPP_VNF_NAT4_PORT_FWD[0-9] | undefined | Define a static DNAT mapping (old_dest:old_port:new_dest:new_port). |
VR Module: SDNAT4
Choose this mode when, in addition to internet access, you want to redirect all incoming traffic (targeting specific IP addresses) to a VM located behind the Virtual Router. This functionality is similar to the DMZ feature found in home routers. This feature enables source NAT, as in the NAT4 module, and maps (1:1) a public IP addresses to a private IP addresses. All the incoming traffic addressed to the public IP is forwarded to the private IP by defining both SNAT and DNAT rules in iptables.
The following figure depicts the basic LAN topology assumed by the module:
       Public Network (10.2.11.0/24)
      ┌─────────────────────────────────
   ┌──┴─┐
┌──┤eth0├──┐   eth0 IPs (10.2.11.1, 10.2.11.201. 10.2.11.202)
│  └────┘  │     10.2.11.201 --> 172.20.0.128
│  Virtual │     10.2.11.202 --> 172.20.0.130
│  Router  │
│  ┌────┐  │
└──┤eth1├──┘
   └─┬──┘  Private Network (172.20.0.0/24)
     └────┬──────────────┬────────────┬────────────
    172.20.0.128   172.20.0.67   172.20.0.130
       ┌──┴──┐        ┌──┴──┐      ┌──┴──┐
       │ VM1 │        │ VM2 │      │ VM3 │
       └─────┘        └─────┘      └─────┘
Important
You need to assign one IP on the public network to each VM you want to forward the traffic to.SDNAT4 Configuration
The following attributes control the basic configuration for NAT’ing:
- ONEAPP_VNF_SDNAT4_ENABLED to activate the module
- ONEAPP_VNF_SDNAT4_INTERFACES defines the public and private interfaces where the mapping occurs. Usually this identifies the public and private networks.
For the example above simply add:
CONTEXT = [
  ...
  ONEAPP_VNF_SDNAT4_ENABLED    = "YES",
  ONEAPP_VNF_SDNAT4_INTERFACES = "eth0 eth1",
  ...
]
For those VMs that you want to forward the incoming traffic to, you need to add a network interface of type NIC_ALIAS attached to the public network, and label it with the EXTERNAL attribute.
...
NIC_ALIAS = [
  NETWORK  = "public",
  PARENT   = "NIC0",
  EXTERNAL = "YES" ]
...
HyperCX will perform the following actions:
- The VM will get an IP lease from the public network. This IP will not be configured in the VM.
- The VR will discover the new
EXTERNALIP allocation and it will configure the new external IP in its loopback interface for routing purposes. For example, for the10.2.11.201map you will see the following IP addresses in the VR:
$ ip addr show lo
1: lo: <LOOPBACK,UP,LOWER_UP> mtu 65536 qdisc noqueue state UNKNOWN group default qlen 1000
    link/loopback 00:00:00:00:00:00 brd 00:00:00:00:00:00
    inet 127.0.0.1/8 scope host lo
       valid_lft forever preferred_lft forever
    inet 10.2.11.201/32 scope global SDNAT4
       valid_lft forever preferred_lft forever
    inet6 ::1/128 scope host
       valid_lft forever preferred_lft forever
- It will also install DNAT and SNAT rules for the
EXTERNALIP. For example for the10.2.11.201map you will see the following iptables rules in the NAT table:
$ iptables -t nat -vnL DNAT4
Chain DNAT4 (1 references)
 pkts bytes target     prot opt in     out     source               destination
    1    12 DNAT       0    --  *      *       0.0.0.0/0            10.2.11.201          to:172.20.0.128
$ iptables -t nat -vnL SNAT4
Chain SNAT4 (1 references)
 pkts bytes target     prot opt in     out     source               destination
    1    34 SNAT       0    --  *      *       172.20.0.128         0.0.0.0/0            to:10.2.11.201
Connecting to 10.2.11.201 should forward all packets for all protocols, both ways, for example (note, there is no 10.2.11.0/24 ip configured in the VM):
$ ssh root@10.2.11.201 ip addr show eth0
2: eth0: <BROADCAST,MULTICAST,UP,LOWER_UP> mtu 1500 qdisc pfifo_fast state UP qlen 1000
    link/ether 02:00:ac:14:00:80 brd ff:ff:ff:ff:ff:ff
    inet 172.20.0.128/24 scope global eth0
       valid_lft forever preferred_lft forever
    inet6 fe80::acff:fe14:80/64 scope link
       valid_lft forever preferred_lft forever
SDNAT4 Context Configuration Attributes
| Parameter | Default | Description |
|---|---|---|
ONEAPP_VNF_SDNAT4_ENABLED | NO | Enable/Disable SNAT/DNAT feature (YES/NO). |
ONEAPP_VNF_SDNAT4_INTERFACES | none | Mandatory: List of NICs to inspect for mappings (e.g., eth0, …). |
ONEAPP_VNF_SDNAT4_REFRESH_RATE | 30 | Refresh interval between mapping-rule updates (seconds). |
Load Balancing
The virtual router provides open source solutions for load balancing TCP services:
- Keepalived + LVS (IPVS).
- HAProxy.
In this guide we will assume the following configuration:
        Public Network
      ┌───────────────   Users
      │
   ┌──┴─┐  10.0.1.1
┌──┤eth0├────────┐
│  └────┘        │   LB service (http:80)
│ Virtual Router │
│                │   10.0.1.1:80 ┌────► 172.20.0.104:8080
│ Load Balancer  │               │
│  ┌────┐        │               └────► 172.20.0.105:8080
└──┤eth1├────────┘
   └─┬──┘
     │   Private Network
     └────┬─────────────────┬───
     172.20.0.104      172.20.0.105
       ┌──┴──┐           ┌──┴──┐
       │ LB1 │           │ LB2 │
       └─────┘           └─────┘
Note
The Load Balancing service can be provisioned in a failover setup activating the associated keepalived services.Additionally we will consider two LB deployment modes:
- Static: When the number LB servers are fixed and known
- Dynamic: When LB servers can be added/removed from the backend
IP Addresses Placeholders
To configure the LB services you need to define the public (user-facing) IP. This IP is only known once the Virtual Router is deployed and the IP assignment is resolved. Usually, you can refer to the public facing IP of the Virtual router as ETH0_EP0.
For advanced scenarios, HyperCX provides you with some convenient placeholders that are resolved automatically at runtime:
<ETHx_IPy>means “interpolate (in-place) the y-th IP of the x-th NIC”<ETHx_VIPy>means “interpolate (in-place) the y-th Virtual IP of the x-th NIC”<ETHx_EPy>means “interpolate (in-place) the y-th EndPoint of the x-th NIC”
Values of ETHx_IPy and ETHx_VIPy are always merged together to produce ETHx_EPy. When ETHx_VIPy is undefined, then ETHx_EPy is always set to ETHx_IPy as a fallback, that way you can always have some valid “endpoints” even in non-HA scenarios (no VIPs defined).
Note
Virtual IP refers to the IP assigned to the NIC of the virtual router when FLOATING_IP has been set.Static LBs
Static LB: Keepalived LVS
To configure keepalived LVS you need to define:
- The front-end IP and port to expose the service
ONEAPP_VNF_LBx_IP,ONEAPP_VNF_LBx_PORT - The IP and port of the backend severs
ONEAPP_VNF_LBx_SERVERy_HOST,ONEAPP_VNF_LBx_SERVERy_PORTset at deployment time - The protocol and mode where keepalive will use to load balance the services (e.g.
ONEAPP_VNF_LBx_PROTOCOL)
Note
Each variable is indexed for each balanced service LB0, LB1, etc.. and each backend server is indexed as well with SERVER0, SERVER1,.. etc..For example, to create a static LVS-based TCP LB, for the topology above, you can use:
CONTEXT = [
  ...
  ONEAPP_VNF_LB_ENABLED = "YES",

  ONEAPP_VNF_LB0_IP        = "<ETH0_EP0>", # Interpolate the first "endpoint".
  ONEAPP_VNF_LB0_PORT      = "80",
  ONEAPP_VNF_LB0_PROTOCOL  = "TCP",
  ONEAPP_VNF_LB0_METHOD    = "NAT",
  ONEAPP_VNF_LB0_SCHEDULER = "rr", # "Round-robin".

  # Static backends:

  ONEAPP_VNF_LB0_SERVER0_HOST = "172.20.0.104",
  ONEAPP_VNF_LB0_SERVER0_PORT = "8080",
  ONEAPP_VNF_LB0_SERVER1_HOST = "172.20.0.105",
  ONEAPP_VNF_LB0_SERVER1_PORT = "8080",
  ...
]
You can see in the example above, that we defined the LB0 by providing the IP / PORT pair with some extra settings. Then two (static) backends are defined for the LB0.
Static LB: HAProxy
Similarly for HAProxy you need to define:
- The front-end IP and port to expose the service
ONEAPP_VNF_HAPROXY_LBx_IP,ONEAPP_VNF_HAPROXY_LBx_PORT - The IP and port of the backend severs
ONEAPP_VNF_HAPROXY_LBx_SERVERy_HOST,ONEAPP_VNF_HAPROXY_LBx_SERVERy_PORT
For example, to create a HAProxy-based TCP LB for the topology above, you can use:
CONTEXT = [
  ...
  ONEAPP_VNF_HAPROXY_ENABLED = "YES",

  ONEAPP_VNF_HAPROXY_LB0_IP   = "<ETH0_EP0>", # Interpolate the first "endpoint".
  ONEAPP_VNF_HAPROXY_LB0_PORT = "80",

  # Static backends:

  ONEAPP_VNF_HAPROXY_LB0_SERVER0_HOST = "172.20.0.104",
  ONEAPP_VNF_HAPROXY_LB0_SERVER0_PORT = "8080",
  ONEAPP_VNF_HAPROXY_LB0_SERVER1_HOST = "172.20.0.105",
  ONEAPP_VNF_HAPROXY_LB0_SERVER1_PORT = "8080",
  ...
]
Dynamic LBs
Important
To dynamically add and remove LBs the Virutal Router cannot be instantiated as an standalone VM. It has to be an HyperCX Virtual Router or part of an HyperCX flow (OpenNebula flow). Important
To dynamically add and remove LBs the HyperCX Gate service needs to be configured on the cloud, by the cloud administrators.The procedure is as follows:
- Add
ONEAPP_VNF_LB_ONEGATE_ENABLED="YES"orONEAPP_VNF_HAPROXY_ONEGATE_ENABLED="YES"to the Virtual Router context, to set one or both LBs in the dynamic mode. - Create a new Virtual Machine that includes
BACKEND = YESin itsCONTEXTattribute (not required in OneFlow). - Update the VM to include the IP/HOST, and PORT pairs with the target IP.
Dynamic LB: Keepalived LVS
Let’s assume you already have deployed a Virtual Router in static mode with backends 172.20.0.104 and 172.20.0.105, as described above. To add a new backend. Create a new Virtual Machine, for example you could use the following template:
NAME = MyBackend
...
NIC = [ NETWORK = "private" ]

# The ONEGATE_* values below are created inside the "User Template" of the backend VM.

ONEGATE_LB0_IP = "<ETH0_EP0>"
ONEGATE_LB0_PORT = 80

CONTEXT = [
  ...
  NETWORK = YES,
  SSH_PUBLIC_KEY = "$USER[SSH_KEY]",
  BACKEND = YES, # NOTE: This isn't required when running inside OneFlow.
  ...
]
Once the VM is created look for the assigned IP in the private network (for example let’s assume it is 172.20.0.133) and update the user template contents with the IP/PORT pairs:
ONEGATE_LB0_SERVER_HOST = "172.20.0.133"
ONEGATE_LB0_SERVER_PORT = 8080
Note
Dynamic variable ONEGATE_LB0_SERVER_HOST does not contain the server index, this is different from the static definition ONEAPP_VNF_LB0_SERVER0_HOST. Important
The LB’s ONEGATE_LBx_IP / ONEGATE_LBx_PORT pair in the VM template must match those of a statically defined Virtual Router. If this is not the case, then no change will be produced.Dynamic LB: HAProxy
Equivalently you’ll need to create a VM that includes the following attributes in its template:
NAME = MyBackend
...
NIC = [ NETWORK = "private" ]

# The ONEGATE_* values below are created inside the "User Template" of the backend VM.

ONEGATE_HAPROXY_LB0_IP = "<ETH0_EP0>"
ONEGATE_HAPROXY_LB0_PORT = 80

CONTEXT = [
  ...
  NETWORK = YES,
  SSH_PUBLIC_KEY = "$USER[SSH_KEY]",
  BACKEND = YES, # NOTE: This isn't required when running inside OneFlow.
  TOKEN = YES
  ...
]
And then update it with the target IP/PORT:
ONEGATE_HAPROXY_LB0_SERVER_HOST = "172.20.0.133"
ONEGATE_HAPROXY_LB0_SERVER_PORT = 8080
Note
This can be added as a start script on the VM template, so the VM is configured on instantiation.Virtual Router Standalone vs OneFlow Modes.
The Virtual Router appliance can deployed in three different ways:
- As a proper HyperCX Virtual Router instance.
- As a standalone VM, but inside an OneFlow service instance.
- As a standalone VM. (not supported).
When running both types of LBs (static and dynamic) in modes 1. and 2. the context and OneGate interface is exactly the same (with the important caveat, that the mode 1. requires backends to have the CONTEXT = [..., BACKEND = "YES", ...] flag defined).
Under the hood the source of updates is different, it both cases OneGate is used, but in the mode 1. all VNETs attached to the VR are scanned (recursively), in the mode 2. OneFlow provides API responses.
In that sense mode 1. is superior to mode 2., because a “proper” VR can reverse-proxy to any VMs in its attached VNETs (also to VMs running in OneFlow instances), at the same time mode 2. allows for backends from within its OneFlow instance only.
Load Balance Context Configuration Attributes
Keepalived LVS
| Parameter | Default | Description |
|---|---|---|
ONEAPP_VNF_LB_ENABLED | NO | Enable/Disable LB feature (YES/NO). |
ONEAPP_VNF_LB_ONEGATE_ENABLED | NO | Enable/Disable dynamic real servers via OneGate (YES/NO). |
ONEAPP_VNF_LB_INTERFACES | all NICs | List of NICs to listen on (e.g., eth0, eth1, …). |
ONEAPP_VNF_LB_REFRESH_RATE | 30 | Refresh rate between updates of the pool of real servers (seconds). |
ONEAPP_VNF_LB_FWMARK_OFFSET | 10000 | Default starting firewall mark for LVS/IPVS. |
ONEAPP_VNF_LB[0-9]_IP | none | Mandatory: Load balanced IP address. |
ONEAPP_VNF_LB[0-9]_PORT | none | Optional: IP port to specify connection. |
ONEAPP_VNF_LB[0-9]_PROTOCOL | UDP | IP protocol to specify connection (TCP or UDP). |
ONEAPP_VNF_LB[0-9]_METHOD | NAT | LVS/IPVS method (NAT or DR). |
ONEAPP_VNF_LB[0-9]_SCHEDULER | wlc | LVS/IPVS scheduler. |
ONEAPP_VNF_LB[0-9]_SERVER[0-9]_HOST | none | Real server address (IP or hostname). |
ONEAPP_VNF_LB[0-9]_SERVER[0-9]_PORT | none | Optional: Real server port. |
ONEAPP_VNF_LB[0-9]_SERVER[0-9]_WEIGHT | 1 | Real server weight. |
ONEAPP_VNF_LB[0-9]_SERVER[0-9]_ULIMIT | 0 (disabled) | Real server upper limit on connections. |
ONEAPP_VNF_LB[0-9]_SERVER[0-9]_LLIMIT | 0 (disabled) | Real server lower limit on connections. |
ONEGATE_LB[0-9]_IP | none | Mandatory: The load balanced IP address. |
ONEGATE_LB[0-9]_PORT | none | Mandatory: The load balanced IP port. |
ONEGATE_LB[0-9]_SERVER_HOST | none | Real server address (IP or hostname). |
ONEGATE_LB[0-9]_SERVER_PORT | none | Real server port. |
ONEGATE_LB[0-9]_SERVER_WEIGHT | 1 | Real server weight. |
ONEGATE_LB[0-9]_SERVER_ULIMIT | 0 (disabled) | Real server upper limit on connections. |
ONEGATE_LB[0-9]_SERVER_LLIMIT | 0 (disabled) | Real server lower limit on connections. |
 Warning
In the static scenario parameters ONEAPP_VNF_LB[0-9]_PORT and ONEAPP_VNF_LB[0-9]_SERVER[0-9]_PORT are optional, when undefined, LVS assumes all ports have to be forwarded. In result a mapping similar to SDNAT4 is created, the differences are that (unlike SDNAT4) it’s unidirectional and load-balanced. Since LVS takes precedence over ports opened in the VR, you may lose SSH access to your VR instance when misconfigured.HAProxy
| Parameter | Default | Description |
|---|---|---|
ONEAPP_VNF_HAPROXY_ENABLED | NO | Enable/Disable HAProxy feature (YES/NO). |
ONEAPP_VNF_HAPROXY_ONEGATE_ENABLED | NO | Enable/Disable dynamic backends via OneGate (YES/NO). |
ONEAPP_VNF_HAPROXY_INTERFACES | all NICs | List of NICs to listen on (e.g., eth0, eth1, …). |
ONEAPP_VNF_HAPROXY_REFRESH_RATE | 30 | Refresh rate between updates of the pool of backends (seconds). |
ONEAPP_VNF_HAPROXY_LB[0-9]_IP | none | Mandatory: Load balanced IP address. |
ONEAPP_VNF_HAPROXY_LB[0-9]_PORT | none | Mandatory: IP port to specify connection. |
ONEAPP_VNF_HAPROXY_LB[0-9]_SERVER[0-9]_HOST | none | Backend address (IP or hostname). |
ONEAPP_VNF_HAPROXY_LB[0-9]_SERVER[0-9]_PORT | none | Backend port. |
ONEGATE_HAPROXY_LB[0-9]_IP | none | Mandatory: The load balanced IP address. |
ONEGATE_HAPROXY_LB[0-9]_PORT | none | Mandatory: The load balanced IP port. |
ONEGATE_HAPROXY_LB[0-9]_SERVER_HOST | none | Backend address (IP or hostname). |
ONEGATE_HAPROXY_LB[0-9]_SERVER_PORT | none | Backend port. |
DNS
This feature implements a DNS recursor, the main use case of it would be to provide DNS to VMs running inside an isolated (no Internet access), private VNET.
DNS Configuration
The following attributes control the basic DNS configuration:
- ONEAPP_VNF_DNS_ENABLED to enable the DNS server
- ONEAPP_VNF_DNS_INTERFACES list of interface names to listen for DNS requests.
For example to enable the recursor on a private network connected to the eth1 NIC:
CONTEXT = [
  ...
  ONEAPP_VNF_DNS_ENABLED    = "YES",
  ONEAPP_VNF_DNS_INTERFACES = "eth1",
  ...
]
You should use the Virtual Router IP (or FLOATING_IP) as the Virtual Network DNS. So for example if your Virtual Router includes:
CONTEXT = [
  ...
  ONEAPP_VROUTER_ETH1_VIP0 = "172.20.0.123",
  ...
]
Then your private Virtual Network should have DNS parameter set to 172.20.0.123 (VIP).
DNS Context Configuration Attributes
| Parameter | Default | Description |
|---|---|---|
ONEAPP_VNF_DNS_ENABLED | NO | Enable/Disable DNS feature (YES/NO). |
ONEAPP_VNF_DNS_INTERFACES | all NICs | List of NICs to listen on (e.g., eth0, eth1, …). |
ONEAPP_VNF_DNS_MAX_CACHE_TTL | 3600 | Maximum caching time (seconds). |
ONEAPP_VNF_DNS_USE_ROOTSERVERS | YES | Use root name servers directly (YES/NO). |
ONEAPP_VNF_DNS_NAMESERVERS | none | List of upstream NSs to forward queries to (e.g., <IP>[@<PORT>], …). |
ONEAPP_VNF_DNS_UPSTREAM_TIMEOUT | 1128 | Upstream NS connection timeout (milliseconds). |
ONEAPP_VNF_DNS_ALLOWED_NETWORKS | all SNs | Client networks allowed to make queries (e.g., <network>/<prefix>, …). |
ONEAPP_VNF_DNS_TCP_DISABLED | NO | Enable/Disable service over TCP (YES/NO). |
ONEAPP_VNF_DNS_UDP_DISABLED | NO | Enable/Disable service over UDP (YES/NO). |
ONEAPP_VNF_DNS_CLUSTER_DOMAIN | vr | Expose ipX.ethY.vr, vipX.ethY.vr, and epX.ethY.vr DNS local-zone names. |
DNS IP / VIP / EP Local-Zone Domain Names
Similarly to IP / VIP / EP Placeholders same logic is reused by the DNS feature. When ONEAPP_VNF_DNS_CLUSTER_DOMAIN context variable is non-empty, then the recursor (unbound) exposes ipX.ethY.<ONEAPP_VNF_DNS_CLUSTER_DOMAIN>, vipX.ethY.<ONEAPP_VNF_DNS_CLUSTER_DOMAIN>, epX.ethY.<ONEAPP_VNF_DNS_CLUSTER_DOMAIN> domain names, so they can be accessed from VNETs attached to the VR.
The primary use case for these domain names would be to always have identical endpoints regardless of the underlying VNETs / subnets / IP addresses. So for example an internal VM could access a service behind TCP LB via https://ep0.eth0.vr. This especially makes a lot of sense for OneFlow services which can be instantiated multiple times requiring minimal configuration.
| CONTEXT VARIABLES | LOCAL-ZONE DOMAINS | |||
|---|---|---|---|---|
| ETH0_IP | ONEAPP_VROUTER_ETH0_VIP0 | ip0.eth0.vr | vip0.eth0.vr | ep0.eth0.vr |
| 10.11.12.13/24 | 10.11.12.254/24 | 10.11.12.13 | 10.11.12.254 | 10.11.12.254 |
| 10.11.12.13/24 | undefined | 10.11.12.13 | undefined | 10.11.12.13 |
| undefined | 10.11.12.254/24 | undefined | 10.11.12.254 | 10.11.12.254 |
| undefined | undefined | undefined | undefined | undefined |
DHCP4
This module implements HyperCX-compatible DHCP server. IP leases are based on the client MAC address as set by HyperCX. The lowest 32-bits of the MAC address corresponds to the IP address assigned in HyperCX.
DHCP4 Virtual Router Configuration
The following attributes control the basic configuration for the DHCP service:
ONEAPP_VNF_DHCP4_ENABLEDto enable the DHCP serviceONEAPP_VNF_DHCP4_INTERFACESlist of interfaces to listen for DHCP_DISCOVER messagesONEAPP_VNF_DHCP4_DNSDNS server IP to send as DHCP optionONEAPP_VNF_DHCP4_GATEWAYdefault gateway IP to send as DHCP option
For example, to configure a Virtual Router as DHCP server and default gateway for the the associated private network:
CONTEXT = [
  ...
  ONEAPP_VNF_DHCP4_ENABLED    = "YES",
  ONEAPP_VNF_DHCP4_INTERFACES = "eth1",
  ONEAPP_VNF_DHCP4_GATEWAY    = "<ETH1_EP0>", # the "global" default
  ONEAPP_VNF_DHCP4_DNS        = "1.1.1.1",    # the "global" default
  ...
]
Note
The MAC address for particular NIC is constructed as a concatenation of 02:00 (default) prefix followed by hexadecimal representation of the allocated IPv4 address 01:02:03:04 (e.g., for 1.2.3.4). The ONEAPP_VNF_DHCP4_MAC2IP_MACPREFIX must match the MAC_PREFIX (02:00 by default), otherwise no IPv4 address will be assigned.DHCP4 IP Address interpolation for Gateway and DNS
Similarly to the IP Address Placeholders, you can use the same placeholders for defining GW / DNS values, for example:
CONTEXT = [
  ...
  ONEAPP_VNF_DHCP4_ENABLED    = "YES",
  ONEAPP_VNF_DHCP4_INTERFACES = "eth1",

  ONEAPP_VNF_DHCP4_GATEWAY = "<ETH1_EP0>", # the "global" default
  ONEAPP_VNF_DHCP4_DNS     = "1.1.1.1",    # the "global" default

  ONEAPP_VNF_DHCP4_ETH1_GATEWAY = "<ETH1_VIP0>",
  ONEAPP_VNF_DHCP4_ETH1_DNS     = "<ETH1_VIP0>",
  ...
],
DHCP4 Context Configuration Attributes
| Parameter | Default | Description |
|---|---|---|
ONEAPP_VNF_DHCP4_ENABLED | NO | Enable/Disable DHCP4 feature (YES/NO). |
ONEAPP_VNF_DHCP4_INTERFACES | all NICs | List of NICs to listen on (e.g., eth0, eth1, …). |
ONEAPP_VNF_DHCP4_AUTHORITATIVE | YES | Server authoritativity (YES/NO). |
ONEAPP_VNF_DHCP4_LEASE_TIME | 3600 | DHCP lease time (seconds). |
ONEAPP_VNF_DHCP4_DNS | none | Default nameserver (IP address). |
ONEAPP_VNF_DHCP4_GATEWAY | none | Default gateway (IP address). |
ONEAPP_VNF_DHCP4_MAC2IP_ENABLED | YES | Enable/Disable MAC-to-IP translation (YES/NO). |
ONEAPP_VNF_DHCP4_MAC2IP_MACPREFIX | 02:00 | 2-byte HyperCX MAC prefix for MAC-to-IP translation. |
ONEAPP_VNF_DHCP4_ETHx | none | Custom interface subnet/pool range (<CIDR>:<start IP>-<end IP>). |
ONEAPP_VNF_DHCP4_ETHx_DNS | none | Custom interface pool DNS (<IP> …). |
ONEAPP_VNF_DHCP4_ETHx_GATEWAY | none | Custom interface pool gateway (<IP> …). |
ONEAPP_VNF_DHCP4_ETHx_MTU | none | Custom interface pool MTU option (integer). |
Keepalived for Virtual Router Failover
Keepalived offers failover capabilities for Virtual Router instances, utilizing the VRRP protocol to enable seamless failover of the Gateway IP within a network. In HyperCX, a Virtual Routers with multiple instances serve as redundant gateways for the network.
To illustrate, Figure 1 depicts a LAN topology with configured VRRP. In this scenario, there is a single HyperCX Virtual Router featuring three instances: VR-1 (10.0.0.2), VR-2 (10.0.0.3), and VR-3 (10.0.0.4). Each virtual machine can now be configured to utilize the FLOATING_IP of the Virtual Router as its default gateway.
 Public Network
────────┬──────────┬──────────┬───────────────────
        │          │          │
 ┌─ ─ ─ ┼ ─ ─ ─ ─ ─┼ ─ ─ ─ ─ ─┼ ─ ─ ┐ HyperCX Virtual Router
 │      │          │          │     │ VRRP group
 │ ┌────┴───┐ ┌────┴───┐ ┌────┴───┐ │
 │ │        │ │        │ │        │ │ FLOATING_IP
 │ │  VR-1  │ │  VR-2  │ │  VR-3  │ │ 10.0.0.1
 │ │        │ │        │ │        │ │
 │ └──eth1──┘ └──eth1──┘ └──eth1──┘ │
 │     │           │          │     │
 │  10.0.0.2    10.0.0.3   10.0.0.4 │
 │     │           │          │     │
 └─ ─ ─│─ ─ ─ ─ ─ ─│─ ─ ─ ─ ─ ┼─ ─ ─┘
       │           │          │
───────┴───────────┼──────────┼──────────┬───────
Private Network    │          │          │
                   │          │          │
                 ┌─┴──┐     ┌─┴──┐     ┌─┴──┐
                 │ VM │     │ VM │     │ VM │
                 └────┘     └────┘     └────┘
Keepalived: Virtual Router Configuration
The following attributes control the basic configuration for a VRRP group:
FLOATING_IP = YESfor every interface where VRRP protocol needs to runKEEPALIVED_ID(Optional) HyperCX will assign an automatic ID to the VRRP group, use this setting to overwrite.KEEPALIVED_PASSWORD(Optional) sets a password for the VRRP protocol.
For the previous example, you could use:
NAME = "VRRP router"

NIC = [ NETWORK = public ]
NIC = [ NETWORK = private, FLOATING_IP = "YES" ]
Note
Since HyperCX 10.9.2 there is a related feature “floating only”, i.e. FLOATING_ONLY = "YES" attached to a NIC section (NIC = [ ..., FLOATING_ONLY = "YES", ... ]). When enabled, VR gets the VIP, but no other IP addresses are taken from the AR (this is ideal for public VNETs). Note that in this case, the interface with “floating_only” will not run VRRP.When the Virtual Router instances are created, HyperCX will automatically set the following context attributes for each NIC:
| Parameter | Description |
|---|---|
VROUTER_ID | VR ID in HyperCX database. |
VROUTER_KEEPALIVED_ID | ID used as virtual_router_id (1–255). |
VROUTER_KEEPALIVED_PASSWORD | Global VR password (max 8 characters). |
ETHx_VROUTER_IP | “Floating IP” attached (if requested) for ethX. |
ETHx_VROUTER_MANAGEMENT | Set ethX as a management interface (YES/NO). |
Important
When the ONEAPP_VNF_KEEPALIVED_VRID parameter is undefined, then VR tries to detect if SERVICE_ID is defined (or queries OneGate for that id). If it’s possible to obtain the SERVICE_ID, then VR assumes it’s running inside an OneFlow service and computes ONEAPP_VNF_KEEPALIVED_VRID = SERVICE_ID % 255 + 1. That way it should be relatively safe to leave ONEAPP_VNF_KEEPALIVED_VRID unconfigured.Keepalived Context Configuration Attributes
Keepalived Module Configuration Attributes
All module configuration attributes are set from the virtual router definition, you can override default settings by defining them in the context section of the associated VM template.
| Parameter | Default | Description |
|---|---|---|
ONEAPP_VROUTER_ETHx_VIP0 | ETHx_VROUTER_IP | Primary VIP for ethX. |
ONEAPP_VROUTER_ETHx_VIP<1-9> | none | Optional VIPs for ethX. |
ONEAPP_VNF_KEEPALIVED_INTERFACES | all NICs | List of managed NICs (e.g., eth0, eth1, …). |
ONEAPP_VNF_KEEPALIVED_PASSWORD | VROUTER_KEEPALIVED_PASSWORD | Global VR password (max 8 characters). |
ONEAPP_VNF_KEEPALIVED_PRIORITY | 100 | Global VR numerical priority. |
ONEAPP_VNF_KEEPALIVED_VRID | VROUTER_KEEPALIVED_ID | ID used as virtual_router_id (1–255). |
ONEAPP_VNF_KEEPALIVED_INTERVAL | 1 | Global advertising interval (seconds). |
ONEAPP_VNF_KEEPALIVED_ETHx_PASSWORD | ONEAPP_VNF_KEEPALIVED_PASSWORD | VR password for ethX (max 8 characters). |
ONEAPP_VNF_KEEPALIVED_ETHx_PRIORITY | ONEAPP_VNF_KEEPALIVED_PRIORITY | VR numerical priority for ethX. |
ONEAPP_VNF_KEEPALIVED_ETHx_VRID | ONEAPP_VNF_KEEPALIVED_VRID | ID used as virtual_router_id for ethX (1–255). |
ONEAPP_VNF_KEEPALIVED_ETHx_SKIP | NO | Exclude ETHx from VRRP traffic. |
ONEAPP_VNF_KEEPALIVED_ETHx_INTERVAL | ONEAPP_VNF_KEEPALIVED_INTERVAL | Advertising interval for ethX (seconds). |
WireGuard VPN
WireGuard is a simple and lightweight VPN. WireGuard allows you to can connect to an HyperCX virtual networks through an untrusted network. WireGuards relies on cryptographic keys to create secure tunnels between peers. When the WireGuard module is enabled, the Virtual Router will manage these keys and configuration all peers involved.
In this guide we’ll refer to the following concepts:
- Peer. Devices linked via point-to-point VPN tunnels. Peers includes both the virtual router and the clients aiming to join the HyperCX private network.
- Public network. Represents the external, untrusted network interconnecting the peers.
- Private network. This is the HyperCX virtual network you want to connect to.
- Peer network. In addition to public network IP addresses, peers uses special IP addresses to communicate through the VPN tunnels. The peer network refers to this address space.
Important
The Peer network operates internally within WireGuard and does not require the creation of an associated HyperCX virtual network or NIC.The following figure depicts the basic LAN topology assumed by the module:
           ┌────┐    ┌────┐     ┌─ ── ── ── ─── ─┐
           │Peer│    │Peer│     │ Peer subnet    │
           └─┬──┘    └──┬─┘
             │          │       │ 169.254.33.0/24│
        ┌─  ─┼─  ── ── ─┼─ ── ──┴── ── ── ── ── ─┘
        │    │          │
          ┌──┴──────────┴───┬──────────────┐
        │ │                 │Public Network│
      ┌─┴─┴┐                └──────────────┘
┌─────┤eth0├─────┐
│     └────┘     │
│                │
│ Virtual Router │
│                │
│     ┌────┐     │
└─────┤eth1├─────┘
      └──┬─┘
         │
         └─┬─────────┬──────┬────────────────┐
           │         │      │Private Network │
           │         │      │                │
         ┌─┴──┐    ┌─┴──┐   │192.168.1.0/24  │
         │ VM │    │ VM │   └────────────────┘
         └────┘    └────┘
WireGuard Quick Start
WireGuard Virtual Router Configuration
The simplest way to enable the WireGuard module is to include the following attributes in the CONTEXT section of the associated VM template:
    CONTEXT = [
       ...
        ONEAPP_VNF_WG_ENABLED       = "YES",
        ONEAPP_VNF_WG_INTERFACE_OUT = "eth0",
        ONEAPP_VNF_WG_INTERFACE_IN  = "eth1",
       ...
    ]
Simply specify the interfaces connected to the public network (ONEAPP_VNF_WG_INTERFACE_OUT) and the private network (ONEAPP_VNF_WG_INTERFACE_IN).
WireGuard Client Configuration
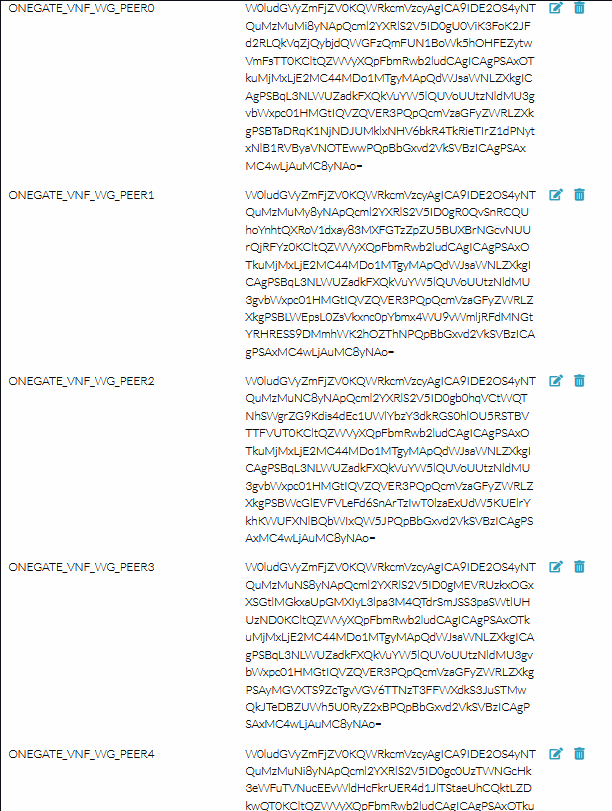
Once the virtual router is running you can retrieve each peer configuration from the associated VM template. The configuration is stored as ONEAPP_VNF_WG_PEER<number>, such as ONEAPP_VNF_WG_PEER0 for the first peer.
Note
By default the virtual router will configure 5 peers, ranging from ONEAPP_VNF_WG_PEER0 to ONEAPP_VNF_WG_PEER4On HyperCX Frontend
Access to the vnf VM info:

There are 5 peers configuration for WireGuard from PEER0 to PEER4:
Those config files are encoded in base64d, so if you want to make use of one of this, you need to decode it:
echo "W0ludGVyZmFjZV0KQWRkcmVzcyAgICA9IDE2OS4yNTQuMzMuMi8yNApQcml2YXRlS2V5ID0gU0ViK3FoK2JFd2RLQkVqZjQybjdQWGFzQmFUN1BoWk5hOHFEZytwVmFsTT0KCltQZWVyXQpFbmRwb2ludCAgICAgPSAxO
TkuMjMxLjE2MC44MDo1MTgyMApQdWJsaWNLZXkgICAgPSBqL3NLWUZadkFXQkVuYW5lQUVoUUtzNldMU3gvbWxpc01HMGtIQVZQVER3PQpQcmVzaGFyZWRLZXkgPSBTaDRqK1NjNDJUMklxNHV6bkR4TkRieTIrZ1dPNytxNlB1RVByaVNOTEw
wPQpBbGxvd2VkSVBzICAgPSAxMC4wLjAuMC8yNAo=" | base64 -d
This is an example output:
[Interface]
Address    = 169.254.33.2/24
PrivateKey = SEb+qh+bEwdKBEjf42n7PXasBaT7PhZNa8qDg+pValM=

[Peer]
Endpoint     = 199.231.160.80:51820
PublicKey    = j/sKYFZvAWBEnaneAEhQKs6WLSx/mlisMG0kHAVPTDw=
PresharedKey = Sh4j+Sc42T2Iq4uznDxNDby2+gWO7+q6PuEPriSNLL0=
AllowedIPs   = 10.0.0.0/24
This file can be shared with the peer so that they can establish the VPN tunnel by executing wg-quick up wg0.conf
Note
The AllowedIPs parameter corresponds to the network address of the HyperCX virtual network. It is recommend to set the NETWORK_MASK attribute for all networks.WireGuard Configuration Attributes
WireGuard Peer Configuration
All the WireGuard configuration files are stored (base64 encoded) in the VM template. When you are running a virtual router with multiple instances these information is stored on all instances. In particular you’ll find:
ONEGATE_VNF_WG_SERVER the configuration file for the WireGuard server running in the virtual router.
ONEGATE_VNF_WG_PEER0, ONEGATE_VNF_WG_PEER1,… Configuration file for each peer.
Important
Important
The configuration files include the server and client private keys. This values are protected with the standard access control mechanisms of HyperCX. You may consider to include them as part of the encrypted attributes to further protect them.WireGuard Module Context Attributes
All module configuration attributes are set from the virtual router definition, you can override default settings by defining them in the context section of the associated VM template.
Sure, here’s the list presented in table form:
| Parameter Name | Default Value | Description |
|---|---|---|
ONEAPP_VNF_WG_ENABLED | "NO" | Enables the service. |
ONEAPP_VNF_WG_INTERFACE_OUT | - | The NIC to connect peers; its IP will be the service endpoint (MANDATORY). |
ONEAPP_VNF_WG_INTERFACE_IN | - | The NIC to connect to the private network (MANDATORY). |
ONEAPP_VNF_WG_LISTEN_PORT | 51820 | Listen port number; defaults to 51820. |
ONEAPP_VNF_WG_DEVICE | wg0 | WG device name; defaults to wg0. |
ONEAPP_VNF_WG_PEERS | 5 | Number of peers; for each one it will generate peer configuration and associated keys. |
ONEAPP_VNF_WG_SUBNET | 169.254.33.0/24 | Subnet used to interconnect WG peers; these addresses should not be part of an OpenNebula virtual network. |
Main References
- Virtual Router in the OpenNebula one-apps project
- Full documentation for the Virtual Router
- Virtual Router Release Notes